
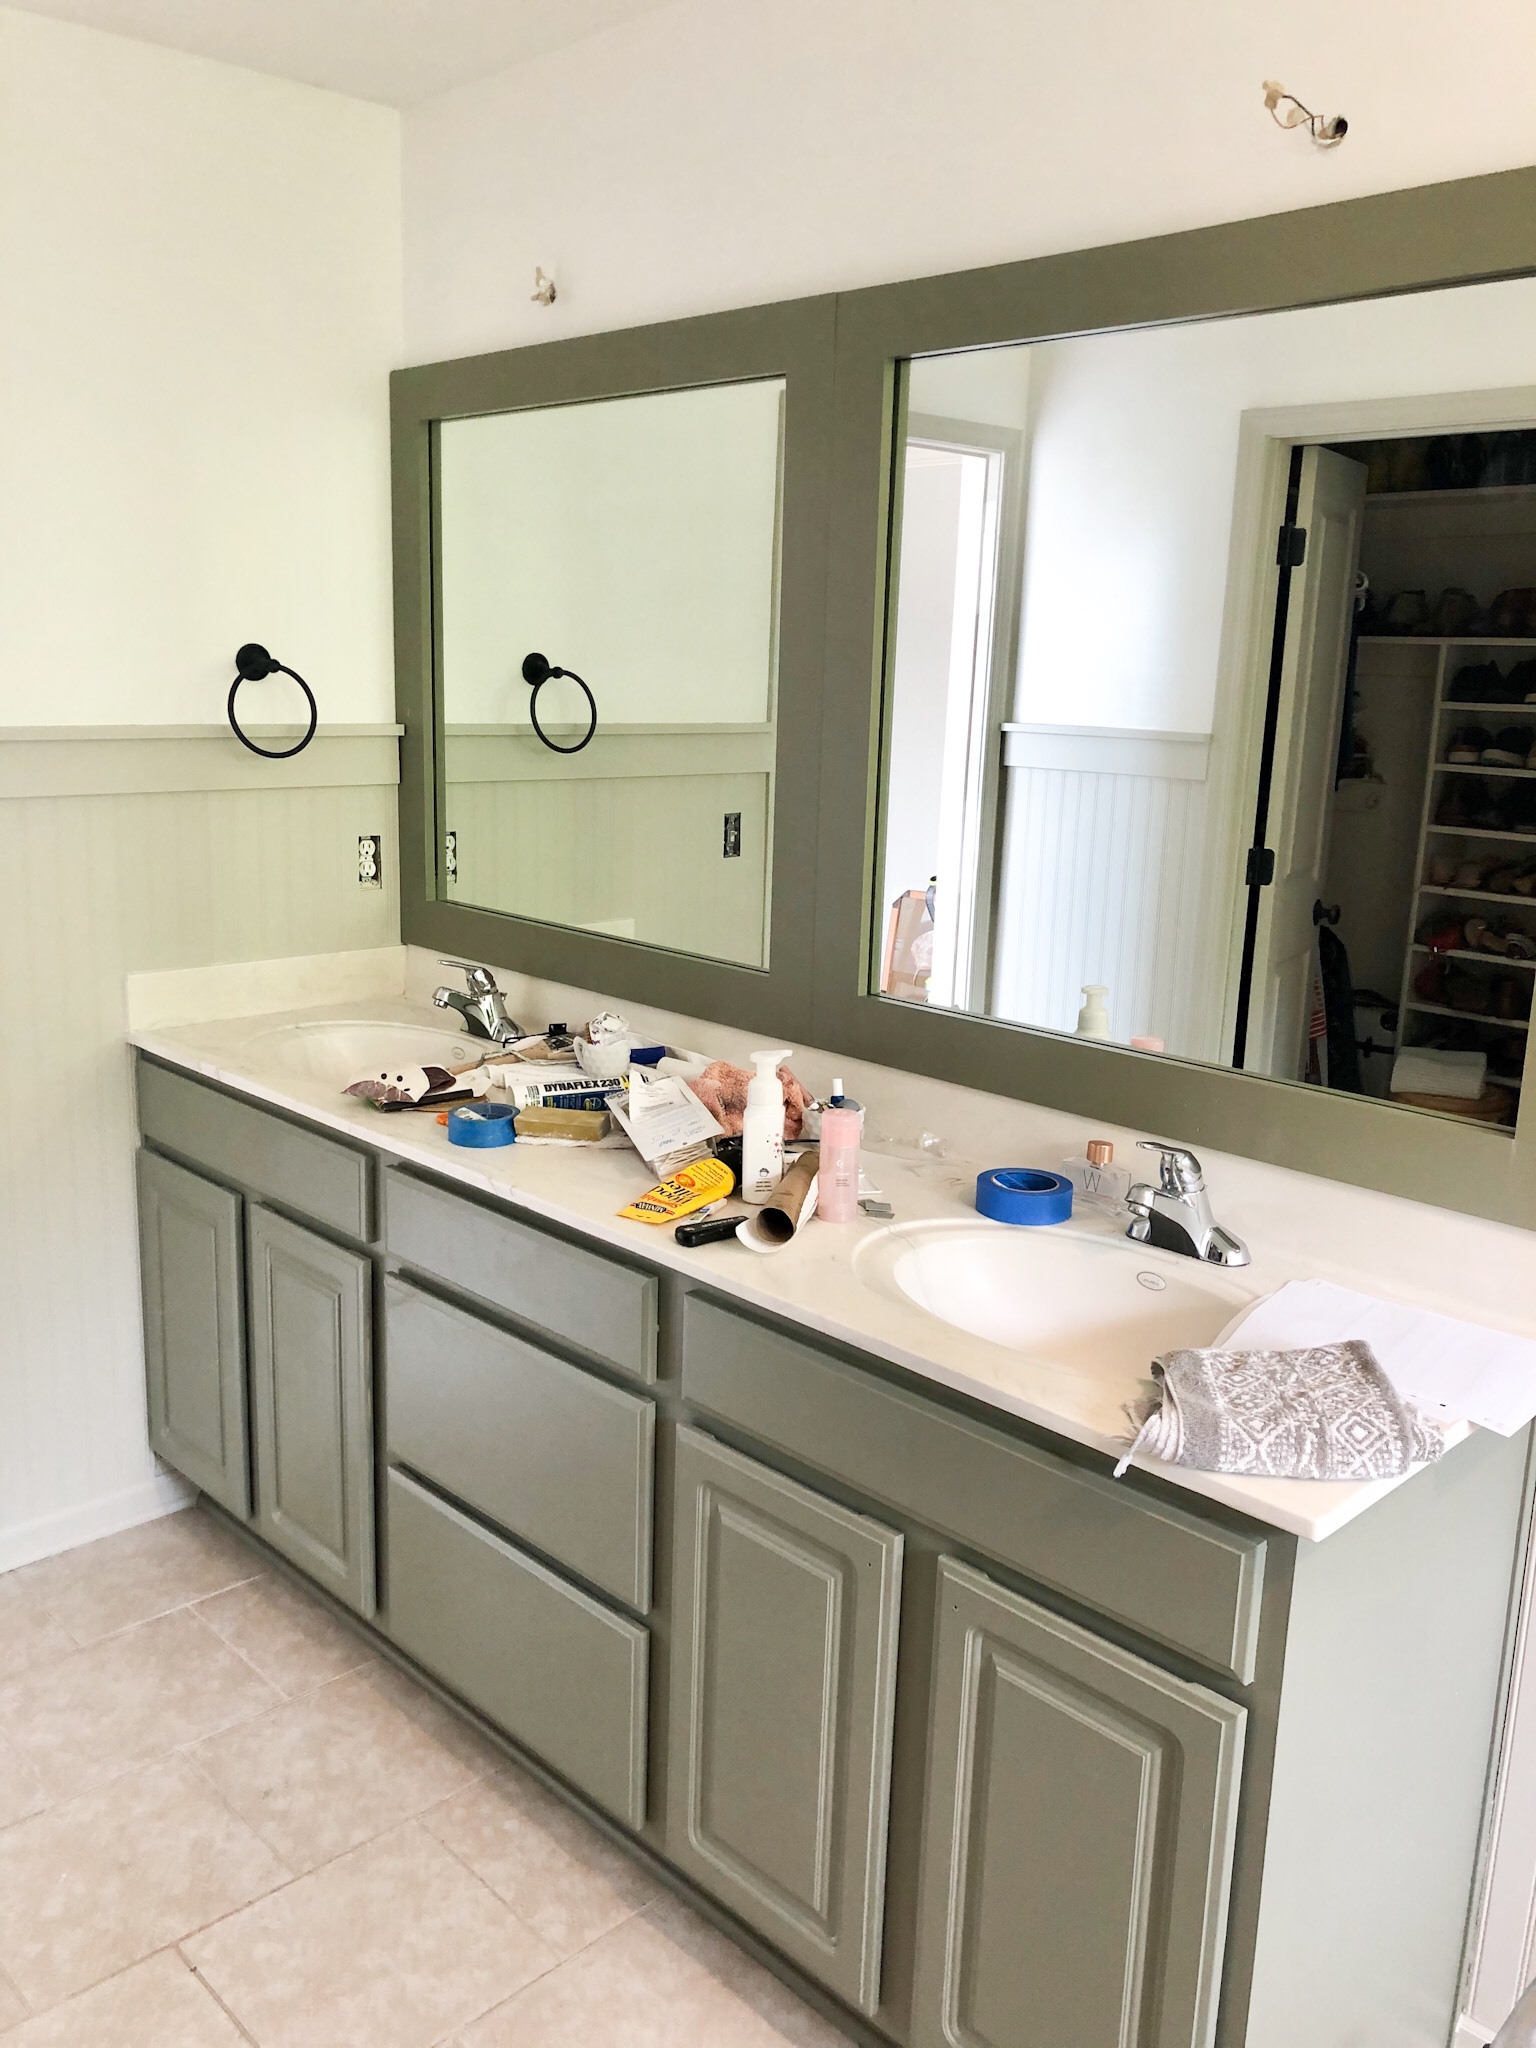
We all have lived with the builder grade giant, frameless mirror over a bathroom vanity. They are boring and there’s nothing cute about them. The problem with taking those down and replacing with a framed mirror is how expensive mirrors are! I never realized how expensive they actually were until we updated our bathrooms at the townhouse we lived in before buying our house. It wasn’t terrible replacing those because the bathrooms were smaller and didn’t require huge mirrors. But if you have a large vanity it looks silly to have a tiny little framed mirror above it. This was my predicament when deciding what to do with our mirror during our master bath refresh. Instead of demoing the mirror we had, we decided to frame the current mirror and instantly we had the look of a custom built-in mirror. The best part is we bought all of the frame materials for less than $30.

Before we built the frames, I had just painted our bathroom vanity a gorgeous shade of greenish gray, Conduit Gray by SW. It was already a huge improvement over the white vinyl covered vanity. I also replaced the drawer pulls with some brushed brass pulls that gave it a completely updated look. I knew, however, that I would never fully love the vanity with the mirror as it was. To remedy this we built two frames, one to cover each half of the mirror. We built two instead of one giant frame because I wanted the look of one mirror over each sink.
You will need these supplies:
1x4x8 pine boards
Wood filler
Sand paper
Kreg Jig (or in my case a nice brother who has one)
Saw (we used a skill saw)
Pocket Screws
Drill
Primer
Paint color of choice
Step 1: Measure the length and height of the entire mirror and determine how many 8’ boards you will need to make a frame for each half of the mirror. I needed four 1x4x8 boards. I used pine because it looks high quality and it’s cheap.
Step 2: Cut an 8’ board down to the length of the entire mirror. Then cut this this in half. Repeat. Then cut other 8’ boards into the height of the mirror. Cut in half and repeat.
Step 3: We did not miter cut the edges of the boards because we had a Kreg Jig in order to be able to connect the boards together to make the frame. If you don’t have access to one of these you can miter the edges which will allow you to attach the boards with an air nailer. This was my first experience with a Kreg Jig so I had to read up on it to learn all the tricks. This post is very helpful https://www.anikasdiylife.com/pocket-hole-tips-and-tricks/
Step 4: Connect boards using drill and pocket hole screws or if edges are mitered, an air nailer. Then apply a thin layer of wood filler in the seams on all four corners of the frames. When they are dry, sand down the seams. They will be completely filled and once painted, you won’t be able to see them at all.
Step 5: Prime and paint!
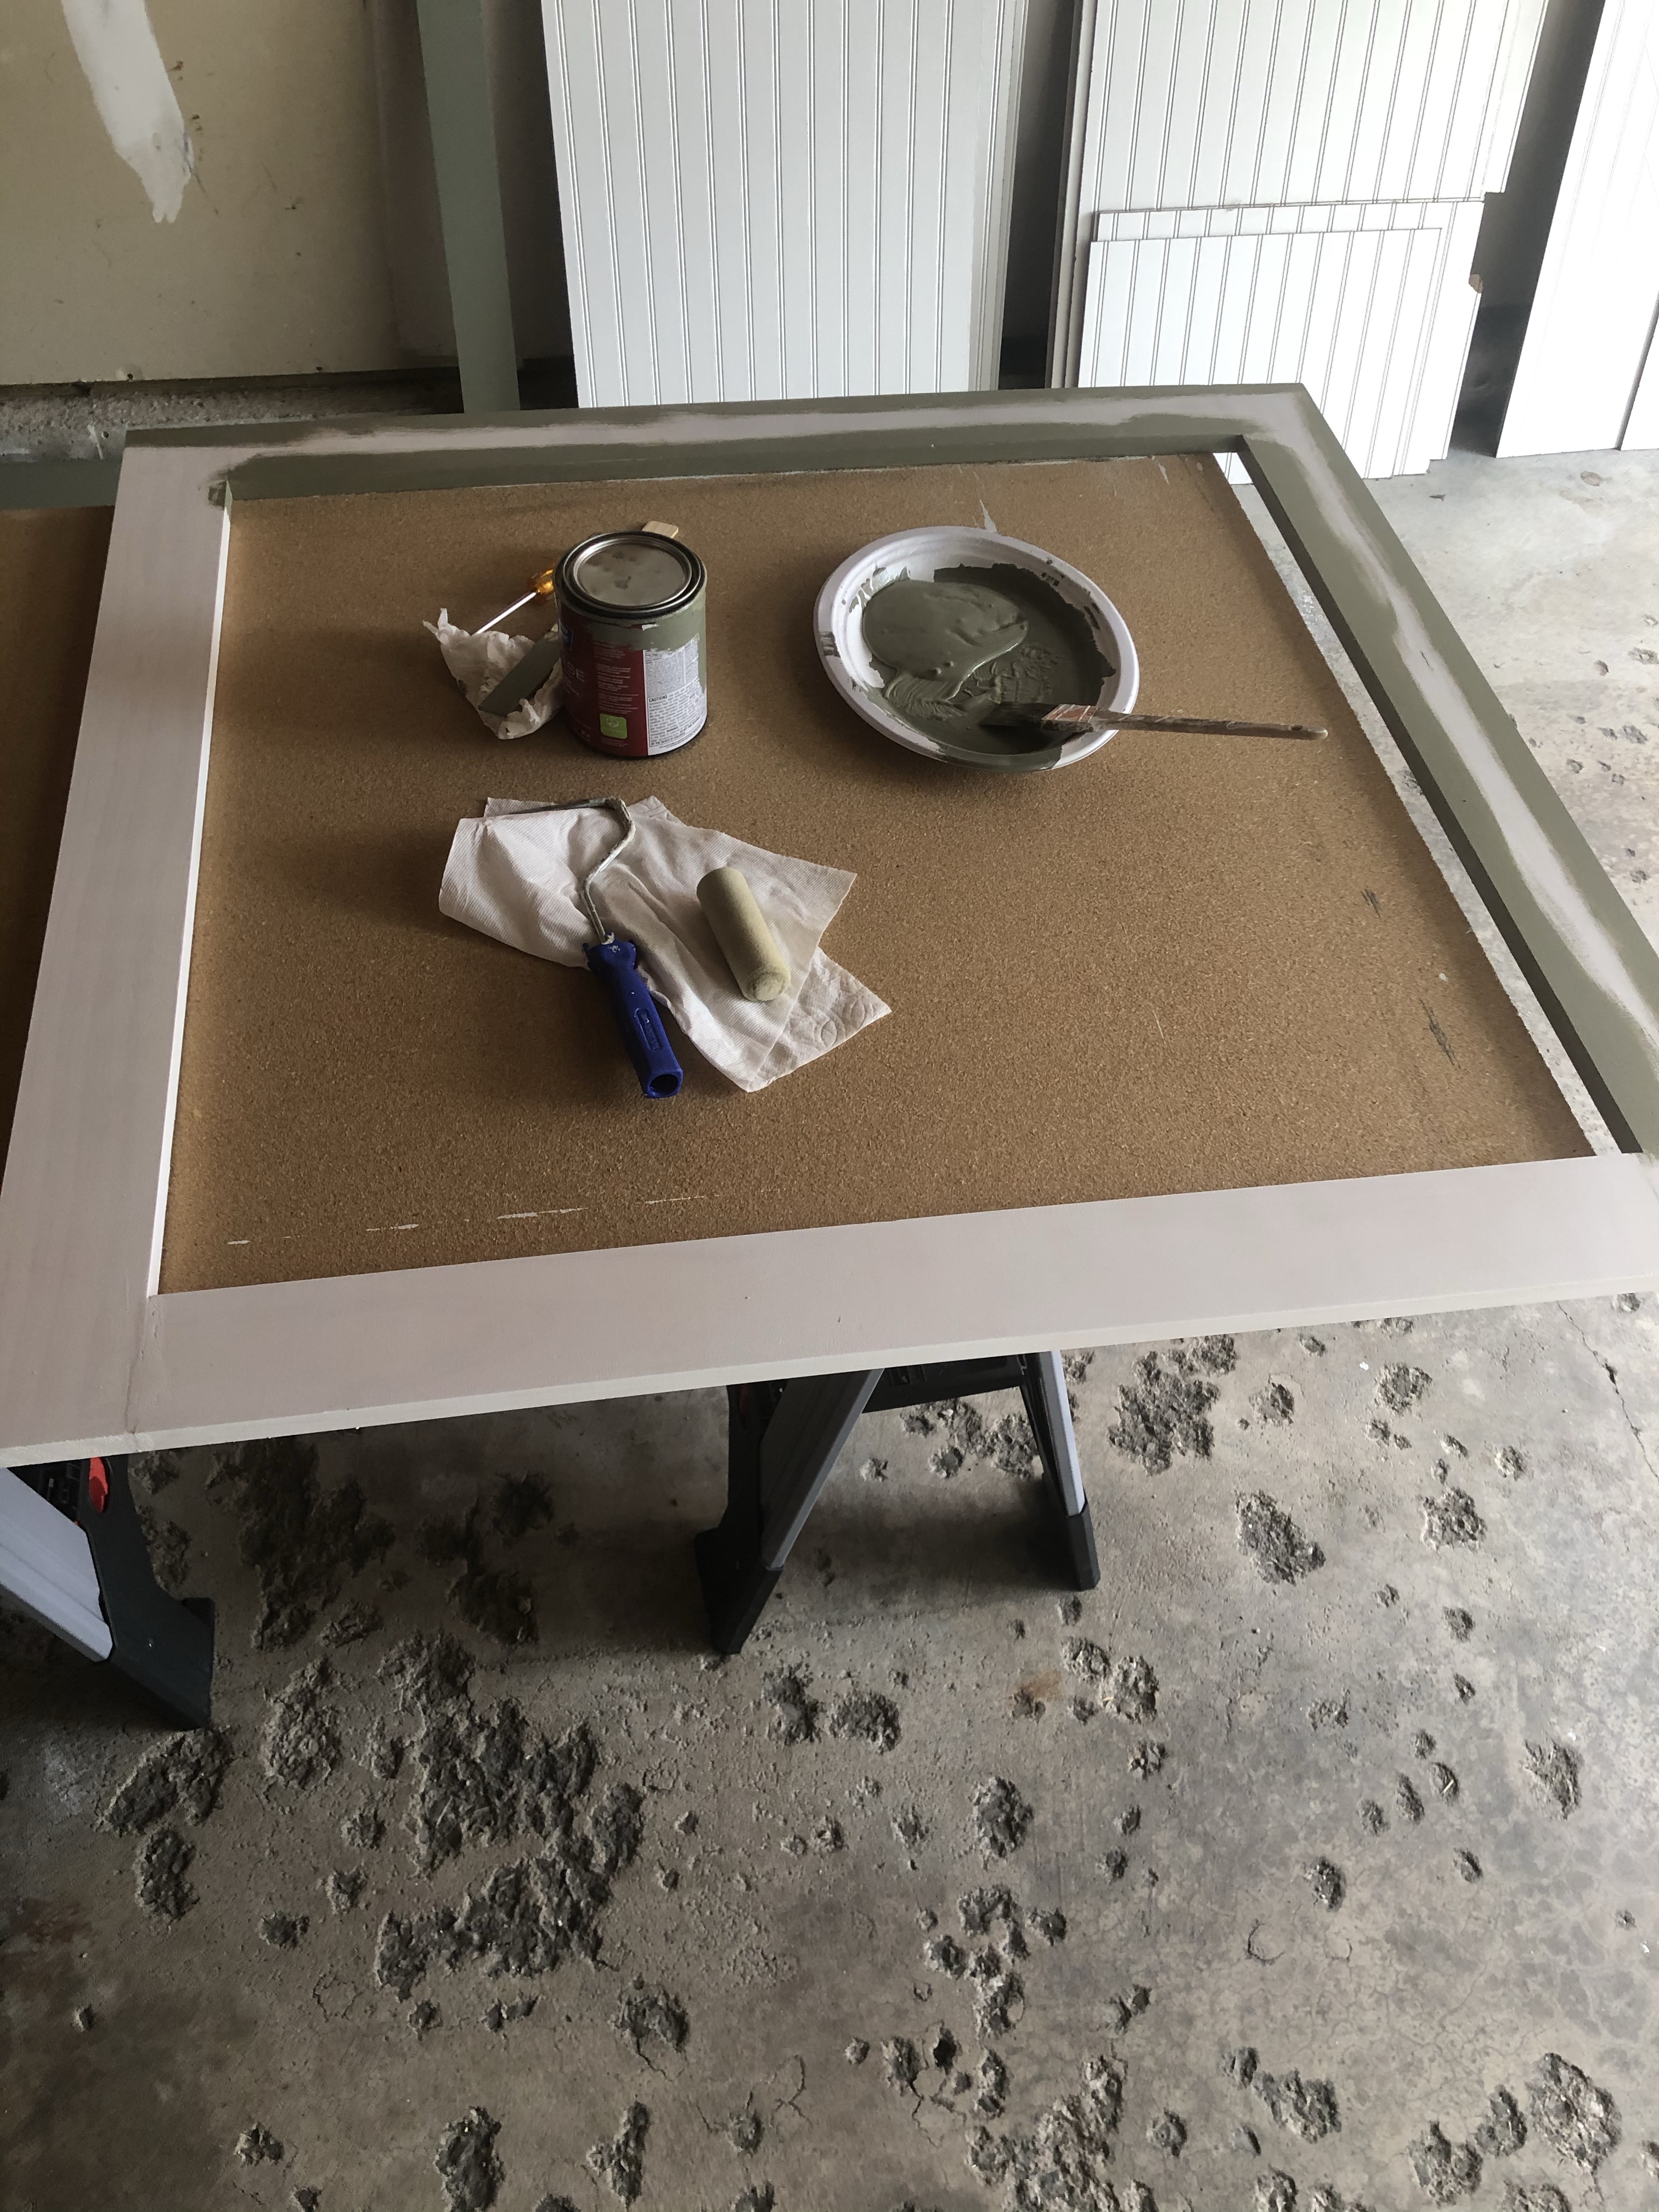
I used Valspar primer from Lowe’s. Then I used my leftover SW paint from the vanity in Conduit Gray. I did one coat of primer and two coats of paint. Tip* this sounds odd but make sure to also paint the back of the frame because you can see the unpainted edge of the frame when it’s against the mirror. I learned that the hard way!
Step 6: Adhere frames to the mirror. This part takes some patience. We used construction adhesive to adhere the frames to the mirror one at a time. One of our frames was a little bowed which was nearly impossible to get to stay flat against the mirror. We had to hold the frame onto the mirror for about 20 minutes before the adhesive started to dry and it stuck down completely. The side that was bowed never stuck down completely but visibly we couldn’t tell in the end. The next frame was easier because the boards were not bowed. We made sure to push it against the mirror for a good 15 minutes to make sure the glue was dry enough to let go. Two of us held each frame down so we could put equal weight distribution on all four sides.
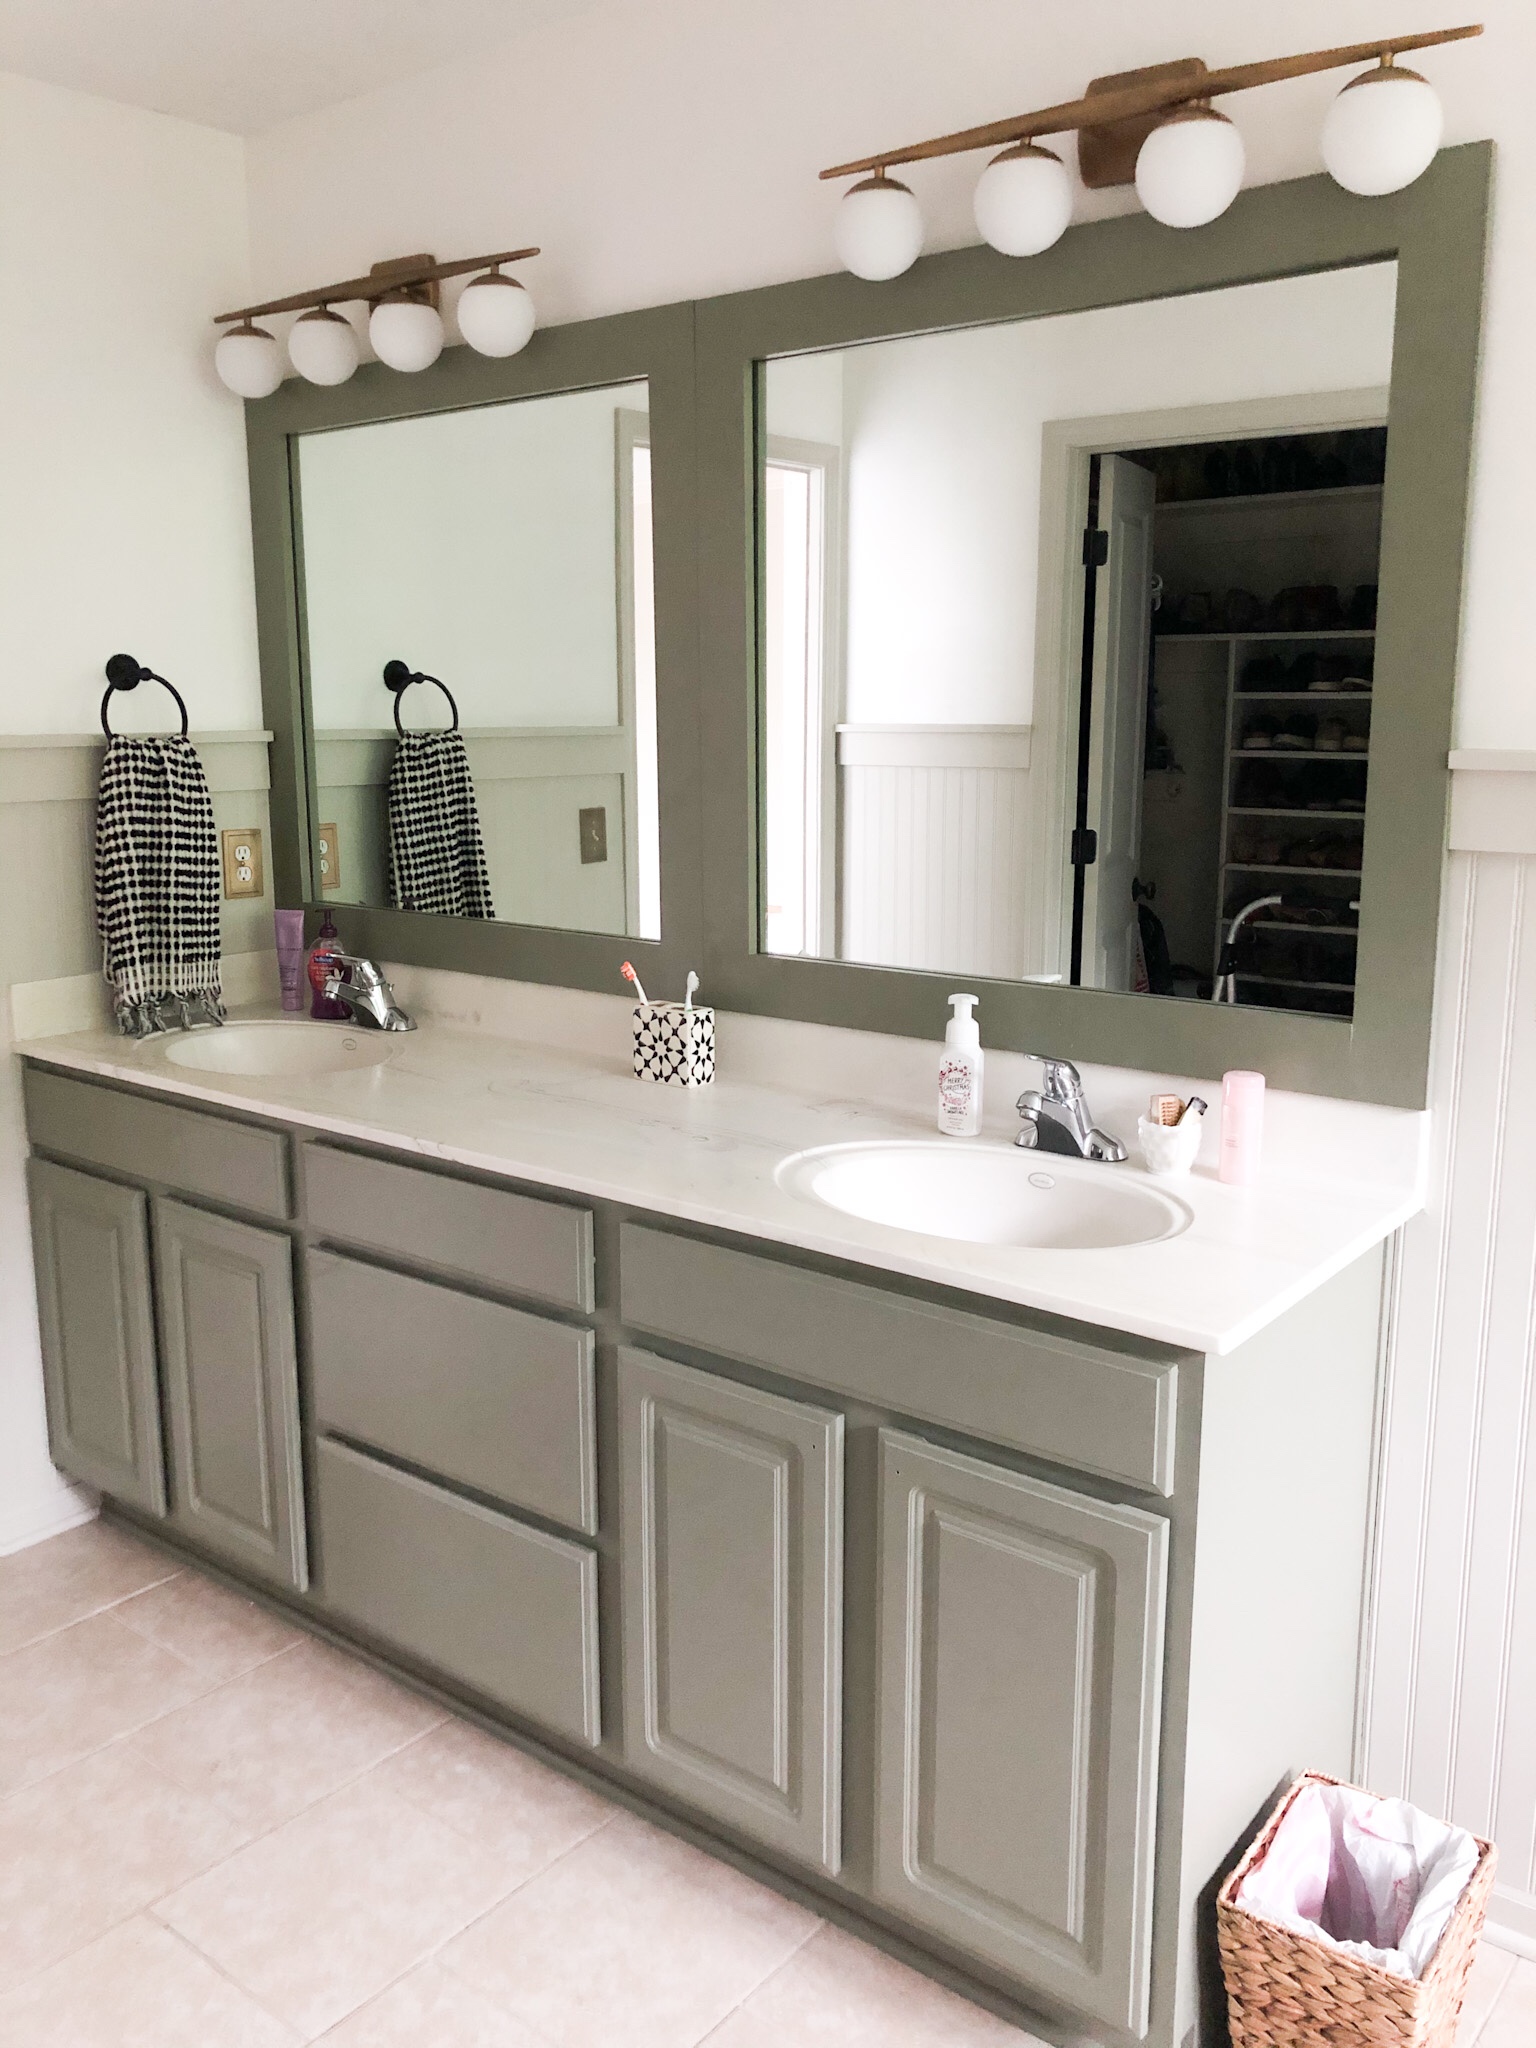
Yay! The look of the entire bathroom has changed for less than $30 and some elbow grease. It didn’t go entirely as planned but still came out great in the end, a true DIY project!
