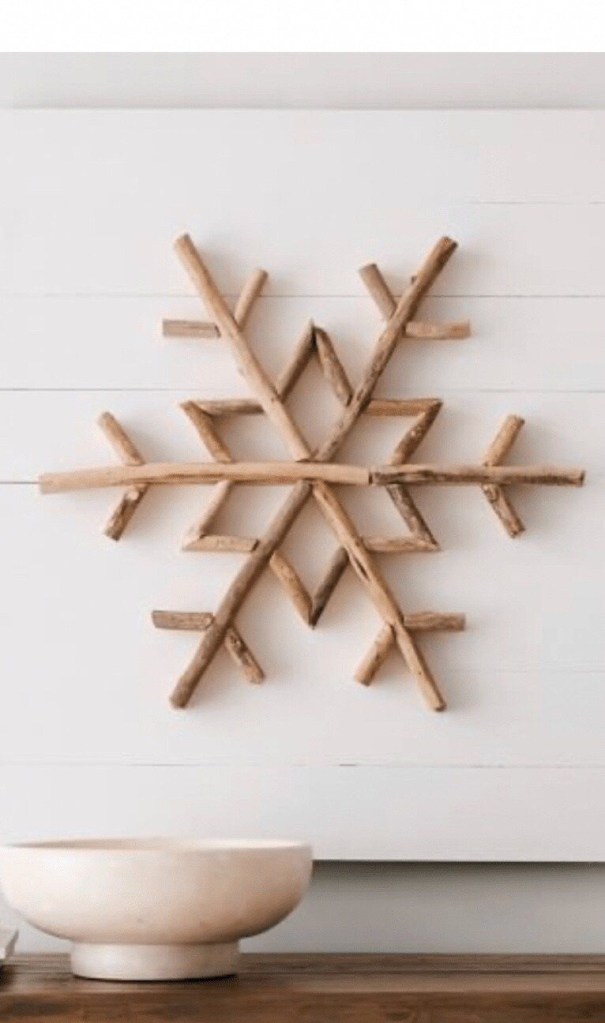
PB Dupe Snowflake Sign

The DIY Iโ€™m sharing this week is a Pottery Barn dupe. I saw this sign on their website and loved it but it was $250 on SALE. So I decided to try and recreate it.
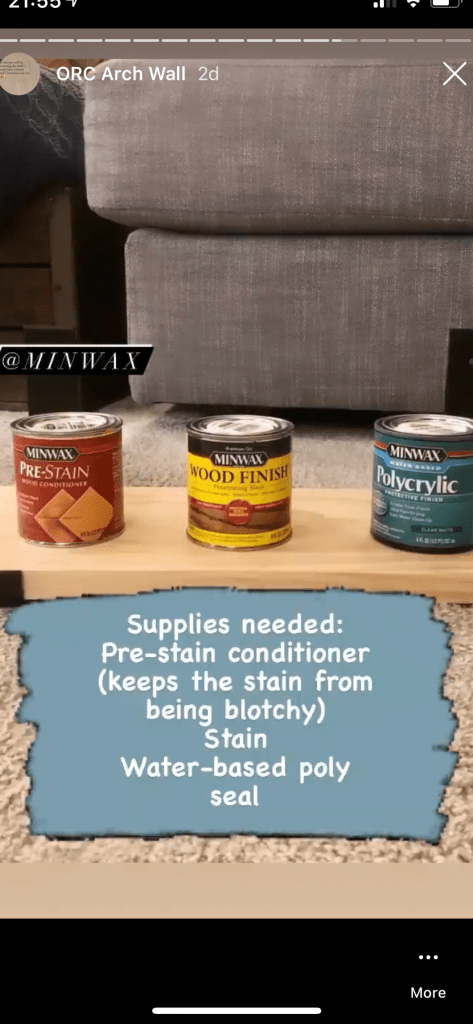
Supplies needed:

2 bags driftwood sticks from Hobby Lobby

10 .5x3x2 pine project boards

Mitre Saw

Air nailer with 1โ€ brad nails or drill/screws

Sandpaper

Wood glue

White paint (I used BM Dove White)

Paint roller


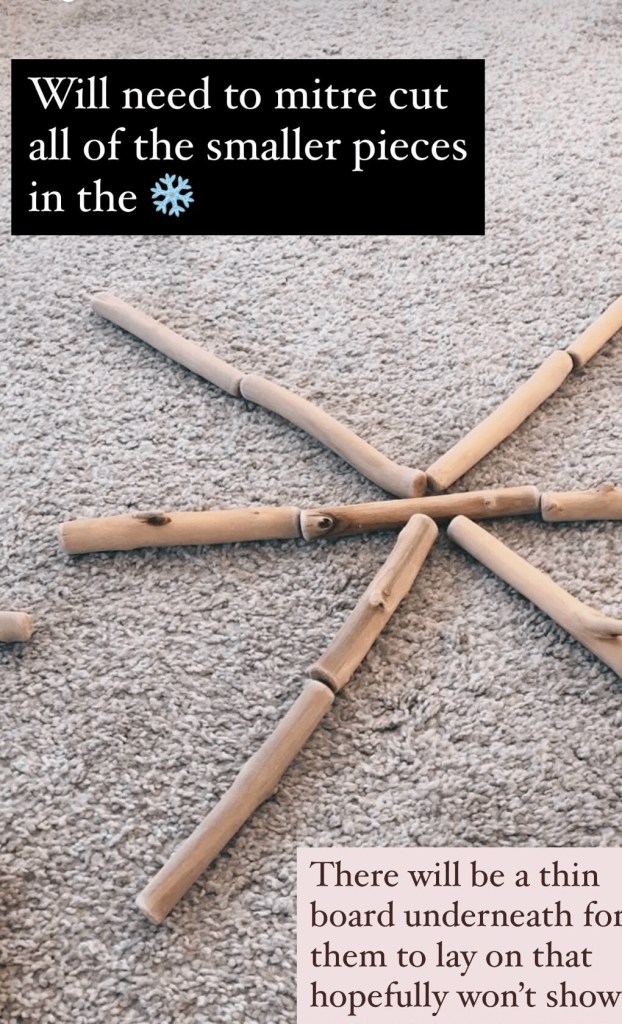
First I laid out the base of the snowflake with the whole driftwood pieces.

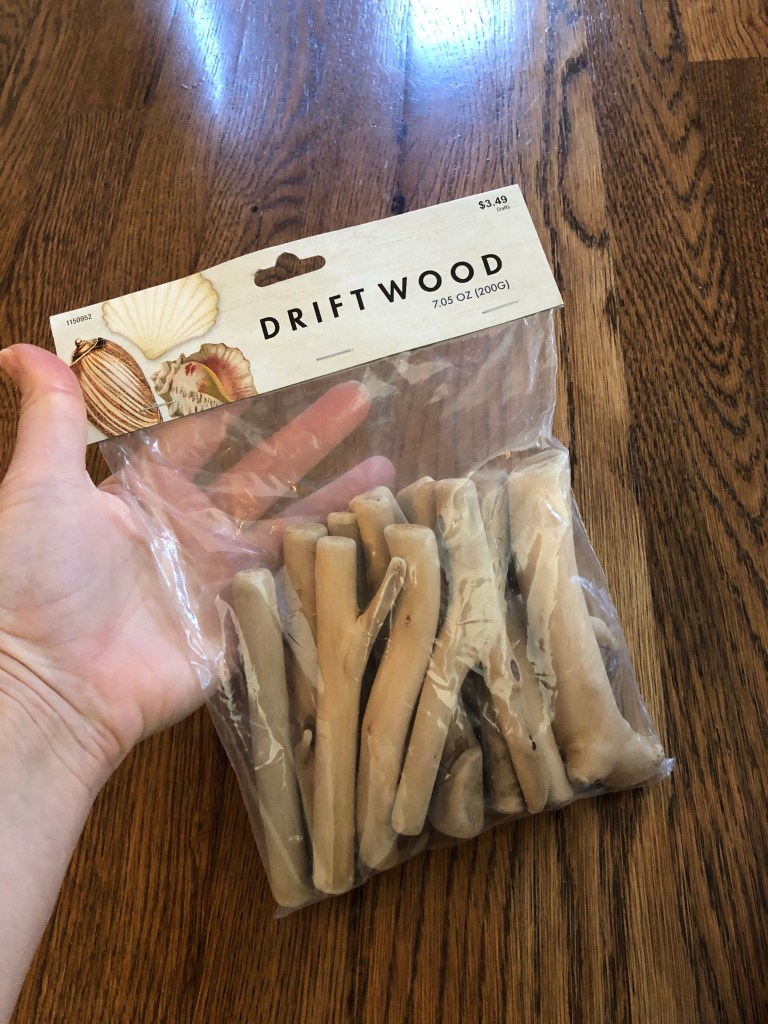
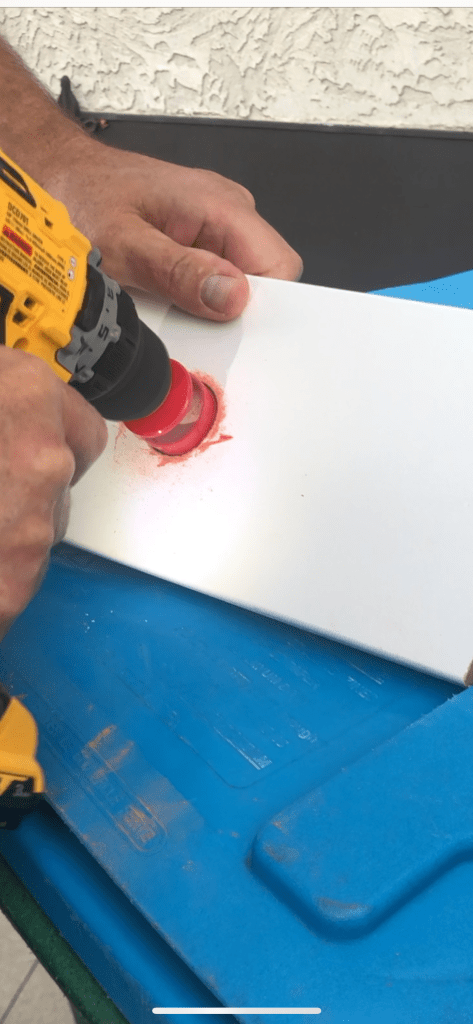
The next part can be dangerous and you need to be very careful to make the cuts safely. The driftwood sticks are so small, you canโ€™t hold them with your fingers to make the cuts. I had my husband hold the stick down firmly with a piece of scrap wood while I made the mitre cut.

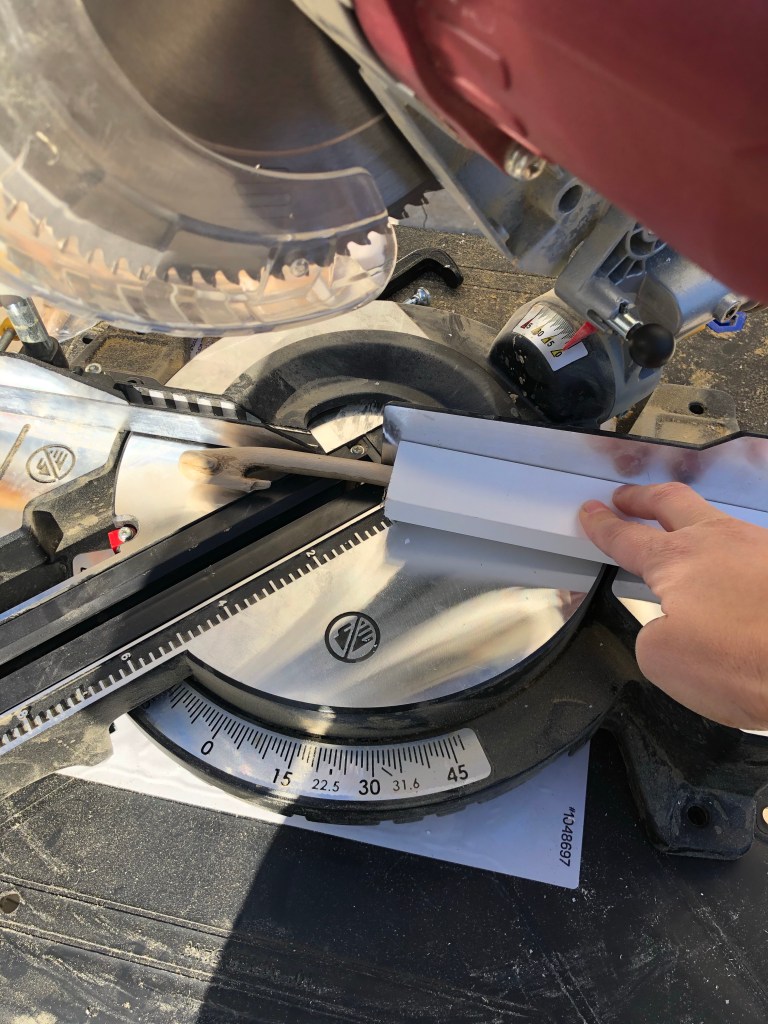
This way we were able to keep our hands far enough away from the saw to be safe. Another note to point out is these pieces are so small that some of them flew off the saw when being cut. We did it on our driveway so it was fine, but you wouldnโ€™t want to make the cuts without safety glasses. Am I inspiring you yet?!? ๐Ÿคช๐Ÿ˜‚

Next I laid out all the mitre cut driftwood sticks into the snowflake.
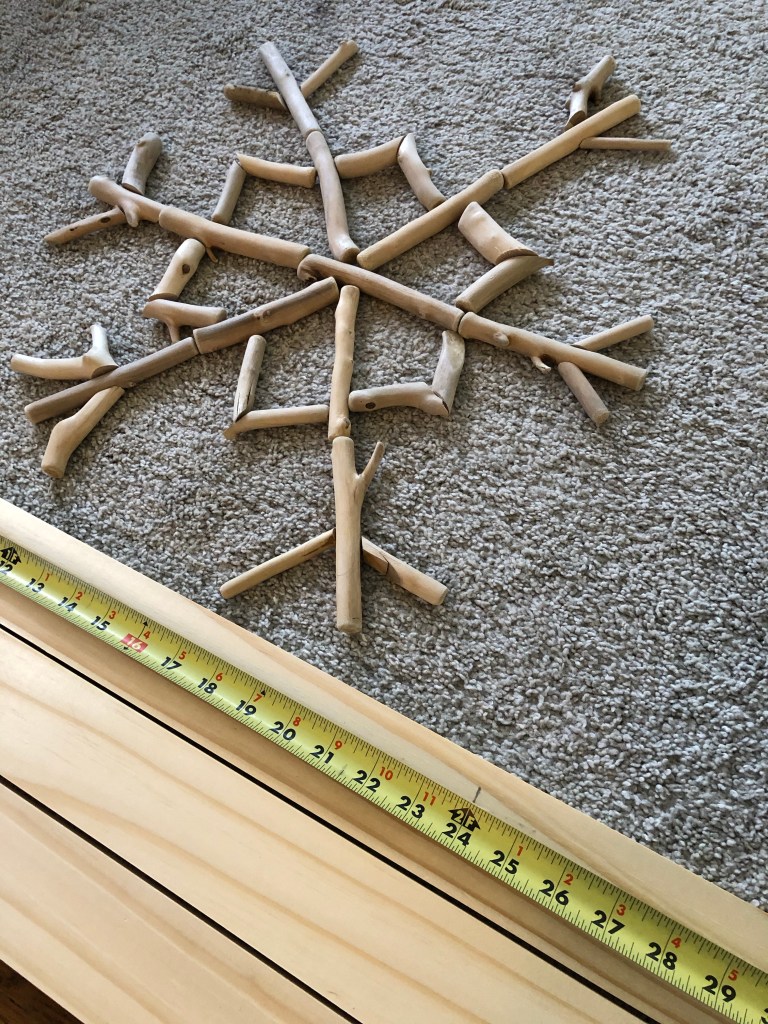
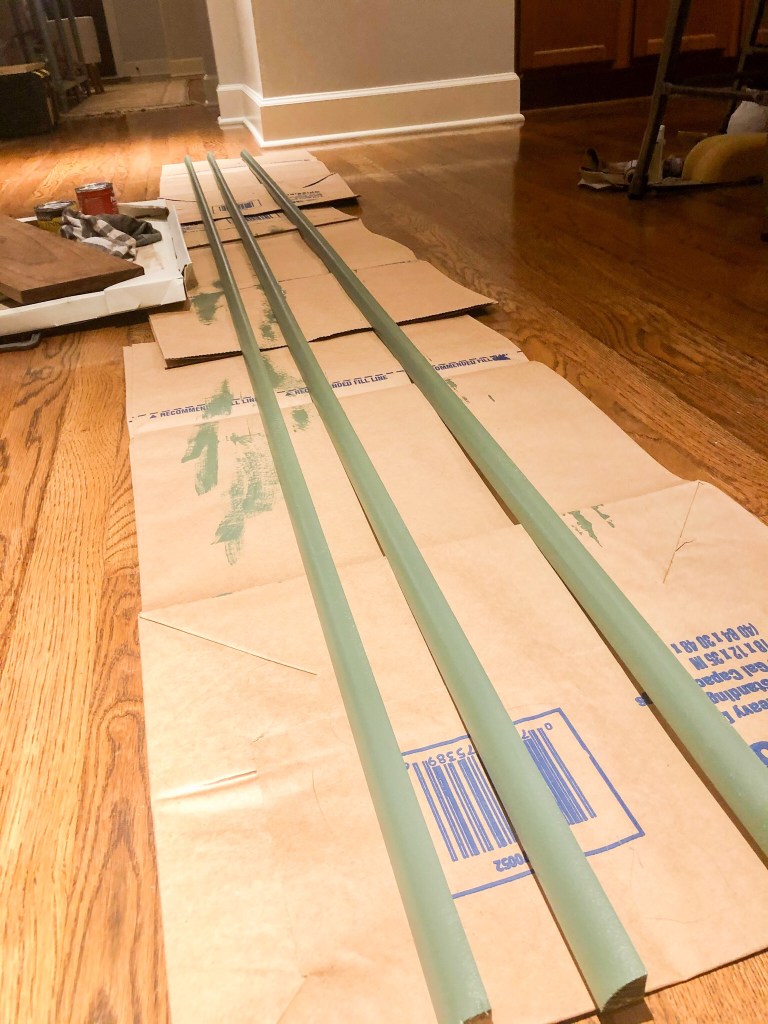
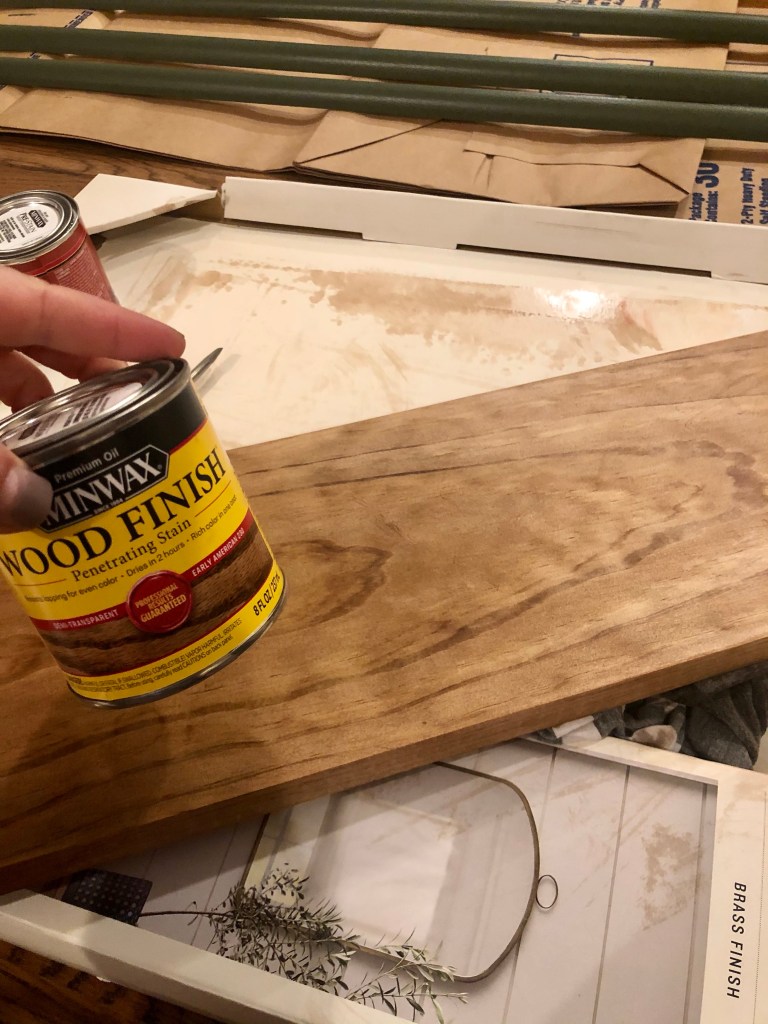
Next is the plank sign. I used 0.5x3x3โ€™ project pine boards and cut them down to 2โ€™ once I knew how big the snowflake was going to be. If I wouldโ€™ve known beforehand, I wouldโ€™ve bought 2โ€™ pine boards to save myself some mitre saw cuts.

I painted the ends of the boards before nailing them together as it wouldโ€™ve been more tedious to paint them once the sign was put together since I staggered the ends.

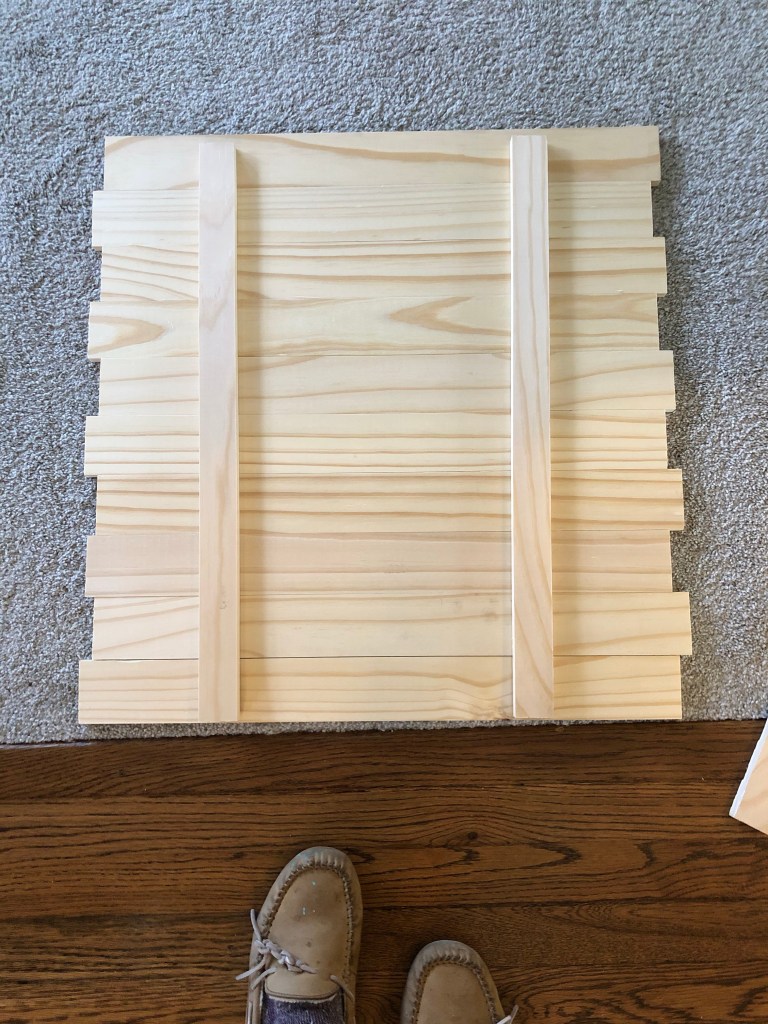
After air nailing in the boards to keep the planks secure, I painted the sign white. I then laid out the snowflake on the sign and used wood glue to lay the pieces in place. I thought I was going to have to use the air nailer in addition to the wood glue to secure the sticks, but turns out, wood glue is serious stuff. So that is the last step!
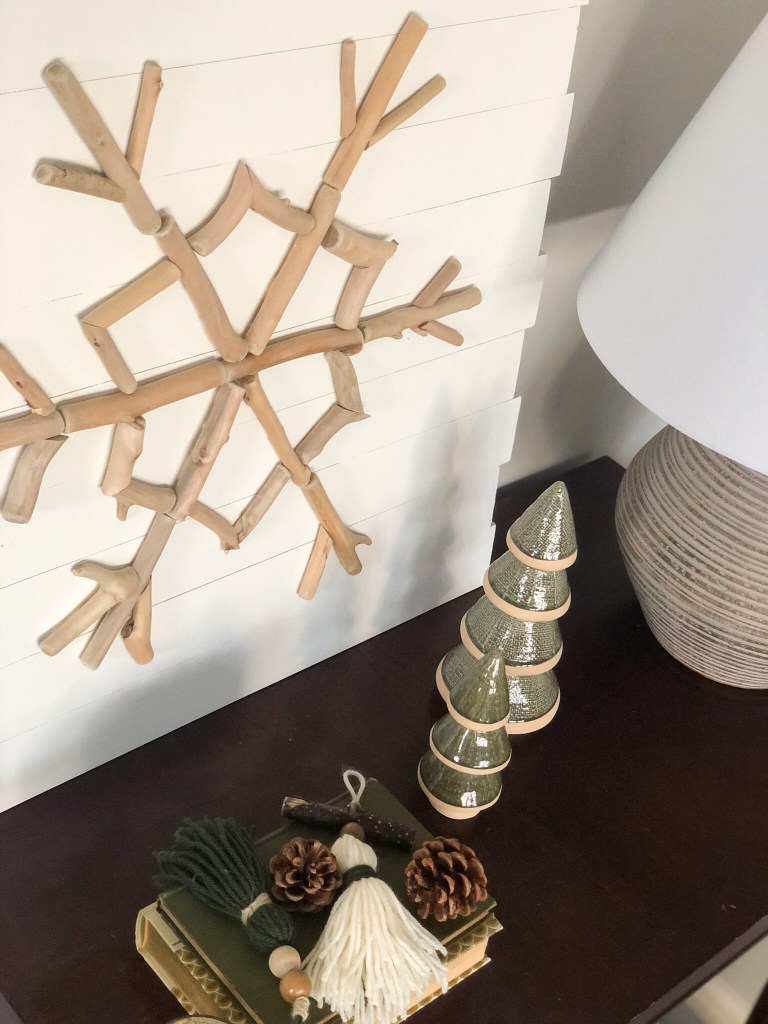
Itโ€™s not quite as perfect as the Pottery Barn version but I spent less than $40 on this instead of $250 ๐Ÿ™Œ๐Ÿป. Annnnnnd I got to practice my power tool skills.
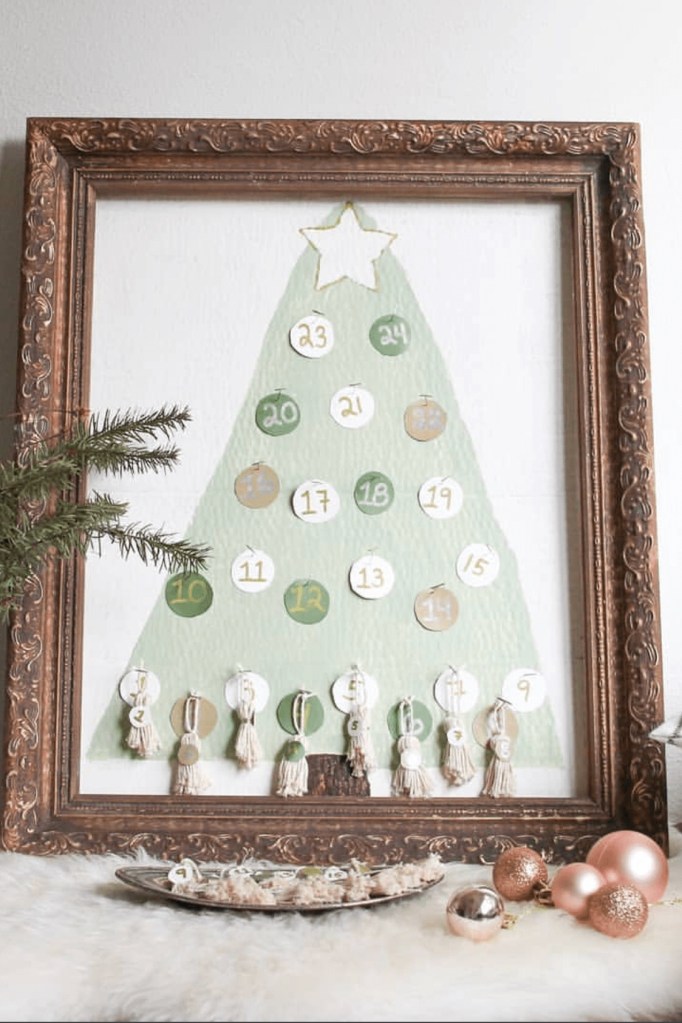
Tag me if you make one, Iโ€™d love to see it! And click HERE for another Christmas DIY by Marie from @this.dear.casa. I love her unique take on this adorable advent calendar!

Happy holiday crafting,

Mindy

Christmas Gift Guide

2020 has been a struggle. More than ever, finding joy in the little things in life is so important. Whether itโ€™s a handmade serving spoon, a framed piece of art, or a new home decor item, we NEED those little glimmers of happiness. Iโ€™ve put together a list of my favorite shops and items from them that have brought a smile to my face during these hard times.

Lilah lifestyle Co

I discovered this shop while creating my wedding registry. They have the most unique, beautiful, and reasonably priced home decor.

Click HERE to see their new arrivals including some adorable modern Christmas ornaments.

East Perry

This shop sources the most gorgeous sheepskin pelts and cowhide rugs. They are organic and posted in small batches so every one is unique. I bought one for my mom last Christmas and she loved it.

Click HERE to shop their current batch.

Xasmin Interiors

This is my favorite pillow shop. They are all handmade one-of-a-kind pillows and their Black Friday sale starts today, 11/25!

Click HERE to see the winter collection.

Meridian

I also discovered this shop while creating our wedding registry. They have the most unique kitchen and home decor items. I have their olive wood salad servers and a coffee scoop that were hand carved and they are so special!

Click HERE to see their gift guide.

Ubdyo

I just found this shop on IG and I love their doormats. They are cute, reasonably priced, and also functional. They are more absorbent than a typical door mat so can also be used for messy things like pet food and water.

Click HERE to view their doormats on Amazon.

Our Spare Change

This shop makes the sweetest personalized brass ornaments. They are so unique and special as a gift for a loved one.

Click HERE to shop their custom ornaments.

Evie Pearl Handmade

This adorable little shop makes all of their bows and clips by hand. Not only do they come in all kinds of colors, patterns and fabrics, they make them for mommas too! They have bows/clips/headbands for all occasions. They also offer bow subscriptions where you get new bows every month.

I know the shop owner and her daughter, Evie Pearl. They are the sweetest, kindest momma and daughter pair. Click HERE to shop.

Lindsay Letters

Lindsay creates all of these special pieces of art herself. They have an Art Bar where you can choose which print you want and how you want it framed or printed on canvas. Their new holiday collection is so special and unique.

Click HERE to shop the holiday collection. All art is currently 15% off!

The Beeswax Co.

This shop hand makes all of their candles with 100% pure beeswax. There are healthy burning properties to these candles and they are also gorgeous. They would make such a simple and elegant table centerpiece for the holidays.

Click HERE to shop candles.

I hope this offers some ideas for unique and special gifts from small shops who take pride in their products. Happy holidays!

Mindy

ORC Final Week- Vintage Inspired Powder Room

More finishing touches this week! The finishing touches have been a bit slow. For one, we ran into the issue that the new faucet did not fit the pre-existing hole in our pedestal sink.

So my dad, being the handy engineer that he is, picked up a drill bit that is able to cut through porcelain. We werenโ€™t sure if it would end up cracking the sink or not, since weโ€™ve never used it before. It was worth a shot to me since I am so in love with the faucet I found.

First we used a scrap MDF board to drill a hole into with the drill bit. The idea is that it serves as a guide when youโ€™re drilling into the sink so it doesnโ€™t slide and go rogue. So I held the guide board securely in place while my dad drilled through the board into the existing sink hole in order to widen it.

Here is his reenactment of drilling the hole ๐Ÿคฃ. Unfortunately I didnโ€™t get to film it. But it worked perfectly and cut a very clean hole, making it wide enough to fit in the new faucet.

We (as in he) hooked the sink back up to the plumbing and installed the drain as well. The new faucet makes it look like an entirely new sink. Iโ€™m so glad we didnโ€™t have to spend another $200-250 for another pedestal sink. I was not willing to give up this faucet ha! It is super sturdy and good quality and was only $100 on Amazon. Considering all the other faucets I liked were in the $300+ range I was willing to drill into my sink for it.

I love how the green paint makes the gold pop. Gold fixtures with bold paint colors are my absolute favorite.

While the sink is back in and the hard part is over, my light fixture has still not come in yet. I ordered from a small Etsy shop who takes their time hand-making every item. Iโ€™m pretty impatient at this point, however I donโ€™t want to hang the mirror before the light fixture as I wonโ€™t be able to place it in the exact spot I want it in relation to the light fixture. So, I am at the mercy of this light fixture and will be able to do the final reveal when that comes in (hopefully only a few more days)!!

I did get the shelf hung on the arch accent wall this week and Iโ€™m loving how it turned out. Itโ€™s exactly what I had envisioned.

So there is my mini-reveal before the mirror and light fixture are in and it is finally complete. This has definitely been a challenging project from start to finish, with having to make all the design decisions at once and executing it all on time, but Iโ€™ve learned a lot from the One Room Challenge process ๐Ÿ™Œ๐Ÿป

To see the last updates, follow my IG page: @heridea.hisproject

Click here to see all of the ORC guest participant updates and reveals:

https://oneroomchallenge.squarespace.com/blog/orcguestss20wk1-khx3f-955p7-bj33w-24pb8-kfs9p-5jbw6

Mindy โœจ

ORC Week 6 – Vintage Inspired Powder Room

This is the final week and I am so excited to see this room come together! I have finished all of the painting so this week will be putting in all of the finishing touches.

With a little trial and error, I was able to finish the arch this week. I ended up free handing it because I made the string and pencil method way harder than it shouldโ€™ve been.

Now that the painting is finished, my next order of business this week is painting the quarter round before we install it. This will make it much easier to paint and I wonโ€™t have to tape the floors. I used a 3/8โ€ nap small roller to quickly roll on the paint.

Paint is same color as board & batton, Backwoods by BM

Second, I am working on my shelf that will hang on the arch accent wall. I bought a 1x8x4 at the hardware store and cut it down to 2โ€™ with my mitre saw. Next comes the staining process.

Iโ€™ve learned the hard way that itโ€™s important not to skip the first step which is the pre-stain conditioner. If you skip this, the wood is likely going to be blotchy.

Stain color: Early American

I ordered J Brackets from Amazon to mount the shelf. 7.25โ€ brackets will fit a 1×8โ€. Itโ€™s a simple shelf that is much cheaper than buying a pre-made shelf.

I also have my mini gallery wall ready to hang and Iโ€™m so happy with how itโ€™s looking together.

Still to do before the final reveal next week:

Install base shoe

Install sink back into place

Install new faucet

Install new light fixture (delayed due to Covid shipping delays)

Hang shelf

Hang gallery wall

I canโ€™t wait to show you guys how it all comes together! See you next week for the FINAL REVEAL ๐Ÿคฉ.

Mindy ๐Ÿค

Follow me on Instagram to see the real time updates! IG Handle: @heridea.hisproject

See all ORC guest participant updates here: https://www.oneroomchallenge.com/blog/orcguestss20wk1-khx3f-955p7-bj33w-24pb8-kfs9p-5jbw6

ORC Week 5 – Vintage Inspired Powder Room

We are coming down the home stretch of the One Room Challenge, and I am so happy with how itโ€™s coming along! This week I finished prepping the walls/trim for paint and I also finished painting the top part of the walls which Iโ€™m doing in SW Bohemian Lace. Itโ€™s already making the room feel bigger as opposed to what I had before, which was a greige color.

I also have the first coat of the board and batten painted and I. Am. In. Love. Backwoods Green by BM is possibly my favorite paint color decision to date. Itโ€™s so rich but doesnโ€™t make the room feel too small. Itโ€™s just the right amount of moody.

I did a super fun and easy DIY art project this week also. I repurposed an old canvas using a fine art print from @shopvintagesupply.

Here are the supplies needed:

Canvas

Spray Adhesive

Wet rag or baby wipe

Super glue

Art print (mine is on fine art paper)

I used the spray adhesive to adhere the art print onto the canvas. I then used a baby wipe to rub around the edges of the print. The harder you press, the more of the dye it takes off of the print, making it more faded and vintage looking. Then I took superglue and put a thin line down the sides underneath the print to ensure the sides stuck down to the canvas. Itโ€™s easier to do this part when the edges of the print are still damp.

I love this option as an alternative way to display art as opposed to framing it. Iโ€™m also going to frame two vintage-inspired art prints and use them to hang a simple 3-piece gallery wall.

See you next week for the FINAL week of ORC! Still to come is an arch accent wall and some other finish touches including art and new fixtures.

Check out all of the ORC participant updates below: ๐Ÿ‘‡๐Ÿผ

https://www.oneroomchallenge.com/blog/orcguestss20wk1-khx3f-955p7-bj33w-24pb8-kfs9p

IG Handle: @heridea.hisproject

Mindy ๐Ÿค

ORC Week 4 – Vintage Inspired Powder Room

I finally got to work this week! The first order of business was ripping out the existing baseboards. You think this would be pretty simple, yet I managed to put some big holes in my walls while tearing out the trim.

And somehow I left black fingerprints everywhere??

So once all the base trim was in, I patched the holes with joint compound. I had to layer it several different times and let it dry between each layer.

I used primed MDF boards for the base trim as well as the rest of the board and batten. I love working with MDF boards. They are so much cheaper than premium pine and are in perfect condition. I always have trouble finding pine boards in good condition that are not bowed.

The board and batten is laid out as follows:

1×4โ€ border

1×3โ€ bats

1×6โ€ base trim

First we put in the 1×6 base trim and 1×4 border pieces. We marked the studs before nailing them in to make sure they were going to be sturdy. Then we placed the 1×3 bats 16 inches apart so we could hit the studs when nailing those in. There was one bat we could not line up with a stud and so we used construction adhesive to secure it to the wall before air nailing it.

I decided to go different direction with the paint color. I was originally going to do a grey color for the board and batten but my favorite gray color was reading a bit purple in this room since there is no natural light. I decided to go with a dark moody color I saw in @buildingwalnutfarmโ€™s mudroom, Backwoods by Benjamin Moore. Iโ€™m going with white walls in Bohemian Lace by Sherwin Williams (I have this leftover from another project).

Inspo for paint color: @buildingwalnutfarm

Because I am scrapping the peel-and-stick wallpaper for on top of the b&b, I decided to add a painted arch accent wall. Iโ€™m going to put this behind the toilet and add a floating shelves in the painted arch. Iโ€™ll use a light tan/beige color for the arch. I loved the wallpaper idea but it was just too expensive so Iโ€™m finding a thrifty yet still unique way to bring a little flare to this room.

@iris_inspiredinteriors

See you back next week for Week 5!

Mindy

IG handle: @heridea.hisproject

Link to ORC blog page: https://www.oneroomchallenge.com/blog/orcguestss20wk1-khx3f-955p7-bj33w-24pb8

ORC- Week 3- Vintage Inspired Powder Room

Iโ€™ve finally made some design decisions and started purchasing things this week! Shocking, because itโ€™s been difficult to narrow down all of my ideas thus far. I typically make only one or two design choices for a room at one time. Doing it all at once is surprisingly much more challenging.

First off, hereโ€™s what I decided for trim work:

Board and Batten

I would love to do a dark moody color for this part, however my powder room is small with no natural light. So Iโ€™m doing some paint sampling with a few dark options vs lighter options.

The second decision I made this week was which art Iโ€™m putting in this room. Iโ€™m going with vintage prints from @shopvintagesupply. I ordered two prints on fine art paper that Iโ€™m going to display two different ways.

Shopvintagesupply.com

Iโ€™m adhering this floral print to canvas. More details on that to come. The second print I chose was this lovely nature-inspired vintage drawing print. Iโ€™m going to frame this one.

Iโ€™m also for sure going to replace my light fixture with a more vintage looking gold wall sconce. Iโ€™m deciding between two different ones as of now.

If you have a favorite let me know!!

Now itโ€™s time to bust out some power tools and put up some board and batten. ๐Ÿ™Œ๐Ÿป Thanks for following along!

Mindy ๐Ÿค

https://www.oneroomchallenge.com/blog/orcguestss20wk1-khx3f-955p7-bj33w

IG handle: @heridea.hisproject

ORC – Week 2 – Vintage Inspired Powder Room

In this weeks learnings, Iโ€™ve decided that putting my ideas down on paper is not an easy task. I typically make design decisions as I go, but the @oneroomchallenge is forcing me to do it all at once. My first moonboard ever was both fun and challenging!

I know I want to put in board and batten or vertical shiplap. I also want to do a peel-and-stick wallpaper on the upper half of the walls. Iโ€™m feeling a floral, neutral vibe for this part and then adding in dark and moody colors with some vintage inspired prints. I love prints from @shopvintagesupply.

I love so many of her prints, but Iโ€™m really digging the moody floral prints for this powder room.

I also want to change the light fixture into something a little more vintage inspired vs. modern like I currently have. One of my favorite DIYโ€™ers, @rebbecaandgenevieve used a fixture in her power room that I am in love with.

Iโ€™d like to change the faucet to something similar, gold and vintage-inspired. Iโ€™m likely going to keep our existing pedestal sink for a couple reasons. First, it is such a small space it would be very difficult to find a vanity that would fit. Secondly, it does go with the vintage theme I am wanting in the room. If I happen to find something on FB Marketplace I could easily change my mind ๐Ÿ™Œ๐Ÿป.

Thanks for following along. Canโ€™t wait to see your project progress over the next few weeks!

One Room Challenge – Vintage Inspired Powder Room

Week 1

I am so excited to do my first @oneroomchallenge! I will be refreshing our half bath over the course of 6 weeks.

Currently this bathroom is very plain and Iโ€™ve wanted to make it over since we moved in a year ago. Annnnnd I finally have power tools of my own to start projecting with!

Here is what I ended up landing on for starter power tools:

Makita air compressor

Bostitch air nailer

10โ€ sliding mitre saw

It will definitely be a learning curve and Iโ€™m slightly intimidated, but hopefully I will learn a lot along the way. Iโ€™m exited however to not have to reply on my dad if I want a project done from now on. Although, he is making me watch a long safety tutorial for the mitre saw ๐Ÿ˜‚.

Let me know if youโ€™re also joining. I canโ€™t wait to see everyoneโ€™s projects!

Dried Floral Arrangement

Iโ€™ve been super into making dried floral arrangements this fall. Some of them are as simple as dried eucalyptus leaves but Iโ€™ve also had fun making arrangement with multiple types of stems and florals. The best part is, they last forever!

My favorite place to get dried florals is Afloral.com. They have so many options and they speak to my soul ๐Ÿ™Œ๐Ÿป. I also have some from Hobby Lobby.

First start with floral tape or floral wire to line your vase or compote. This will help form a structure for the arrangement.

Then I start with the stems that will give heights and shape to the arrangement. In this case I used ruscus stems. I used white because the terra cotta color was sold out but itโ€™s back and the link is below. The color is ๐Ÿ˜๐Ÿ˜.

https://www.afloral.com/products/preserved-ruscus-leaves-in-terracotta-orange

Then I start adding in filler stems.

German Statice (link below)

https://www.afloral.com/products/dried-german-statice-in-white-2-oz-bunch-14-tall

Iโ€™m also so obsessed with the fan palm leaves lately so I added in two colors of color palm. A natural color and a terra-cotta color.

Natural Sun Palm. I also added terra-cotta sun palm. (Links below)

Bundle of 5 Afloral Natural Sun Palms – 14-20"

Bundle of 5 Afloral Terracotta Sun Palms – 14-20"

Finally I added in small touches of blush colored and orange dried flowers. These colors are all so good for fall.

How cute are these?!? ๐Ÿ˜ (Links below)

https://www.afloral.com/products/preserved-mini-silver-daisy-in-pink-11-long

Products

Final result took 20 mins or less. So quick and easy.

I added in plumas grass last which is also so pretty in a vase by itself!
Bleached plume reed (link below)

https://www.afloral.com/products/bleached-plume-reed-grass

Tag me if you make a dried floral arrangement! Iโ€™d love to see it!

Design a site like this with WordPress.com
Get started