
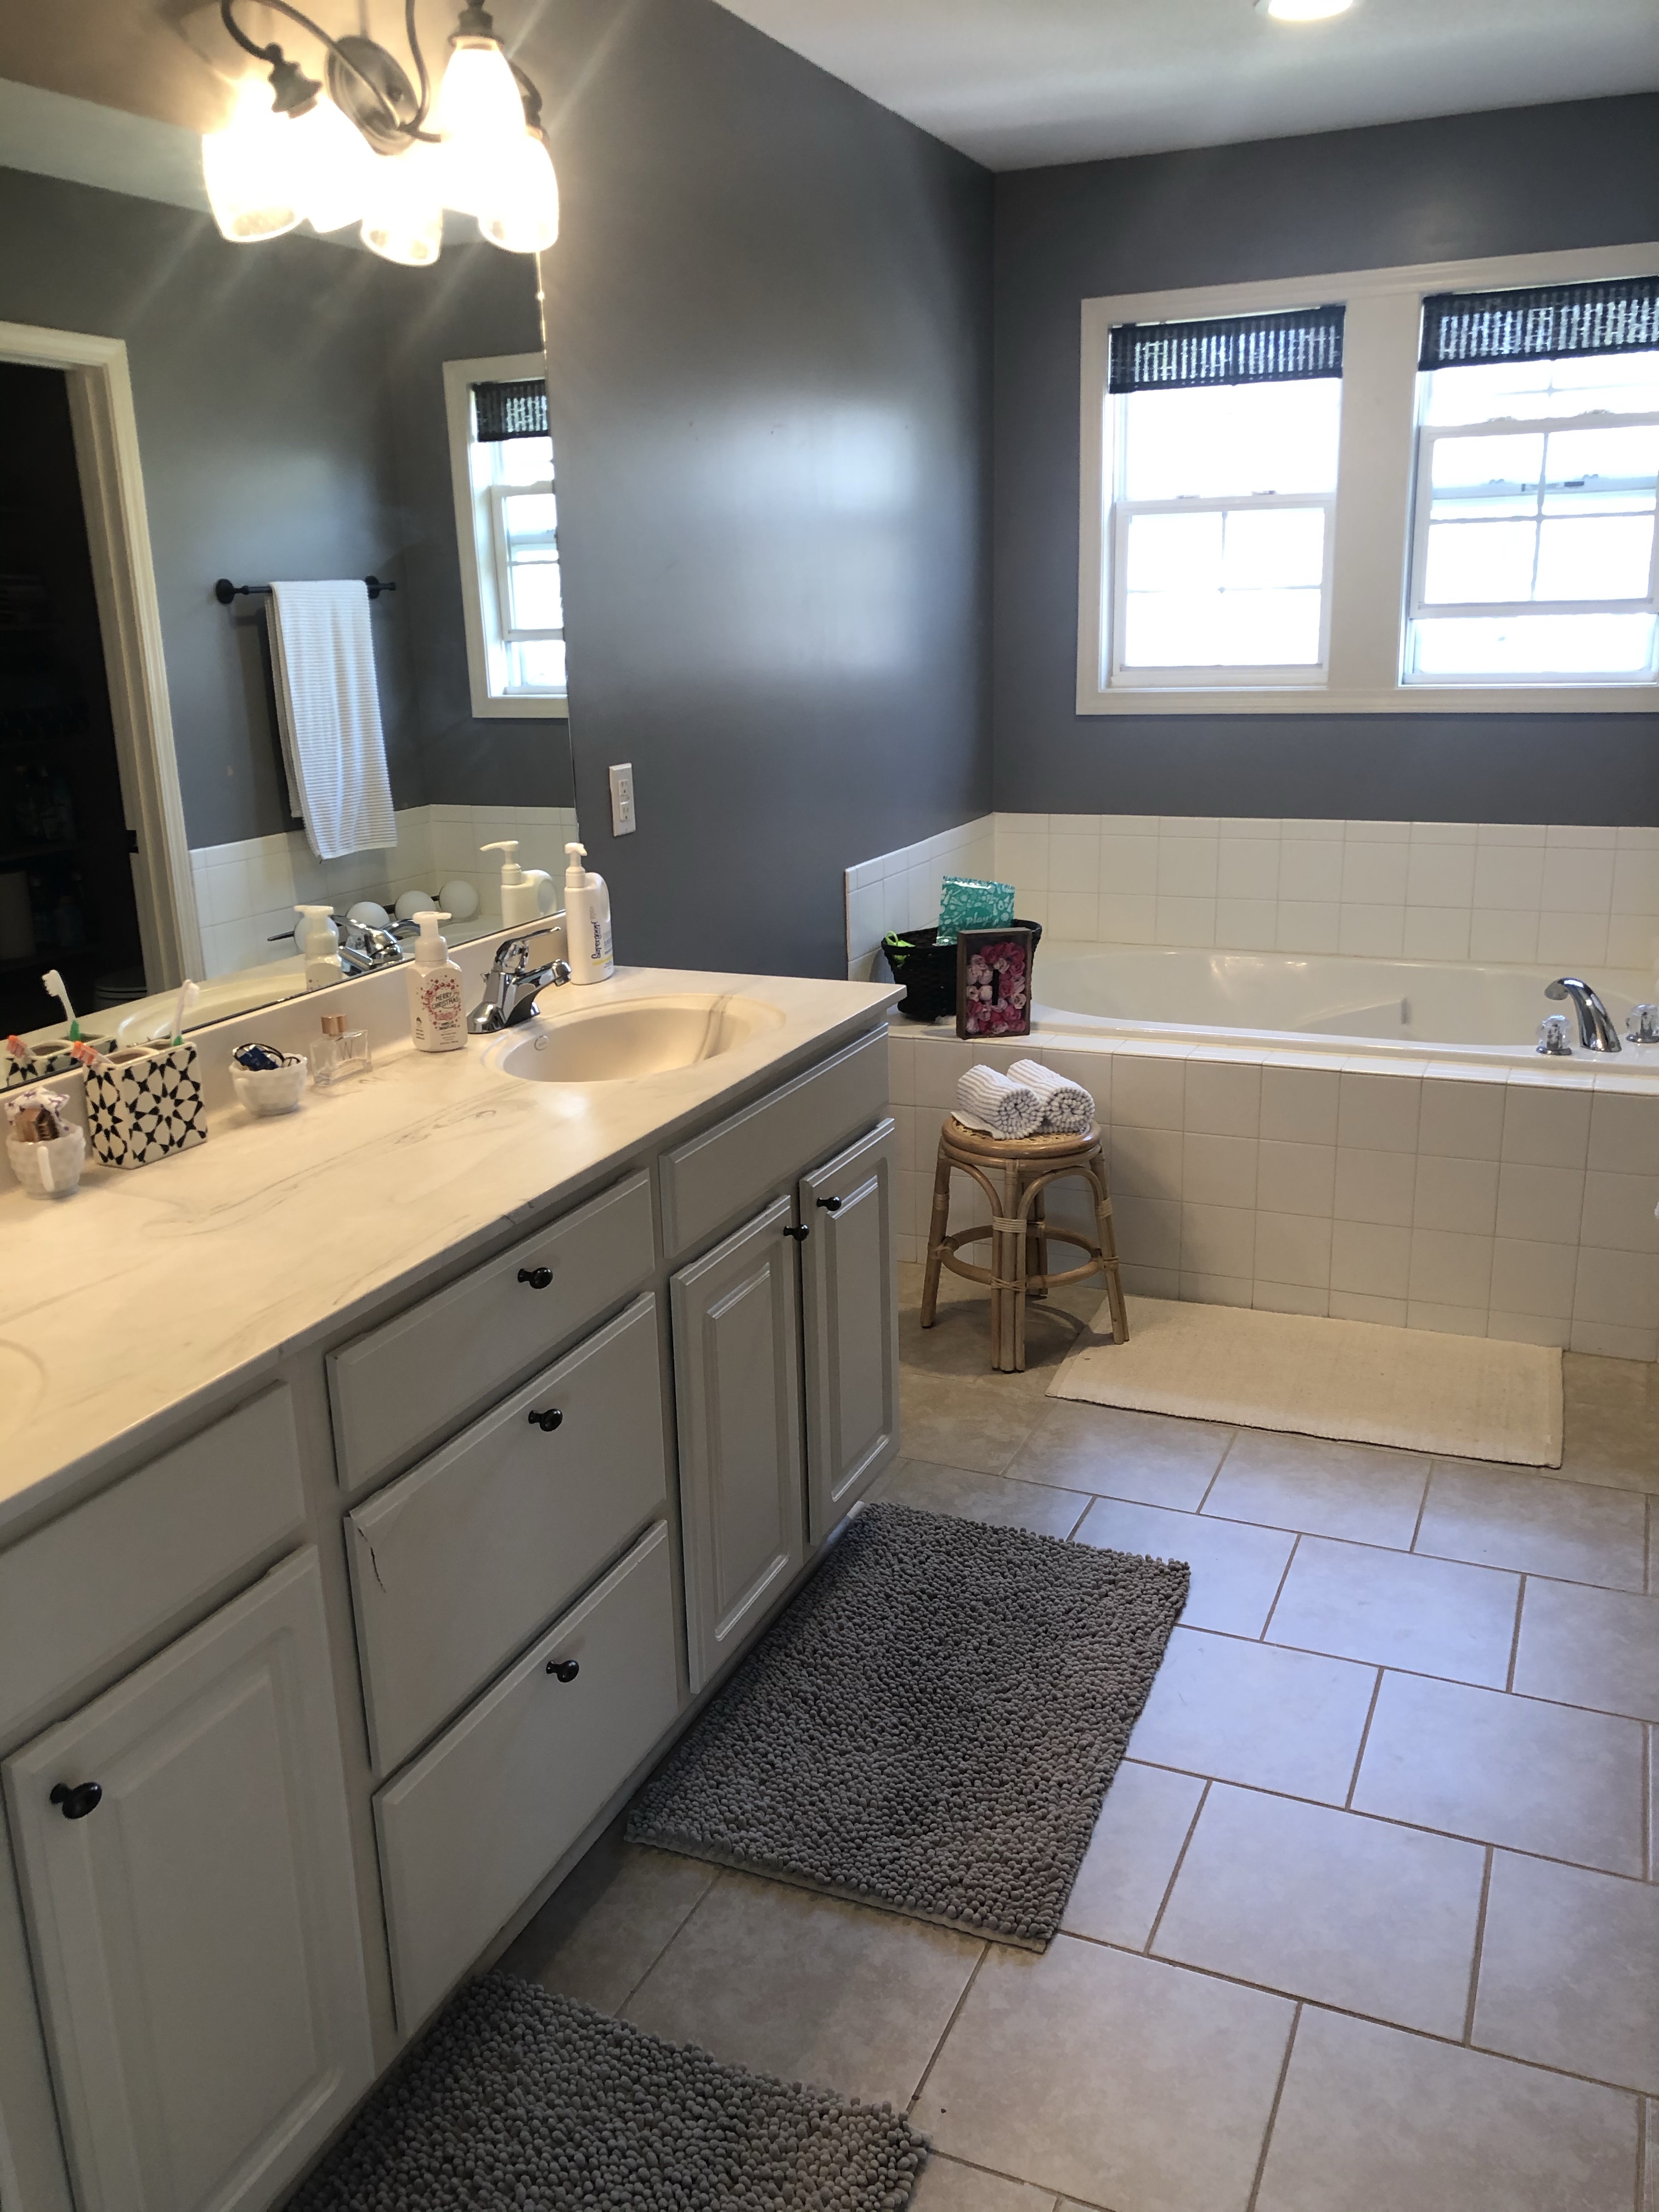
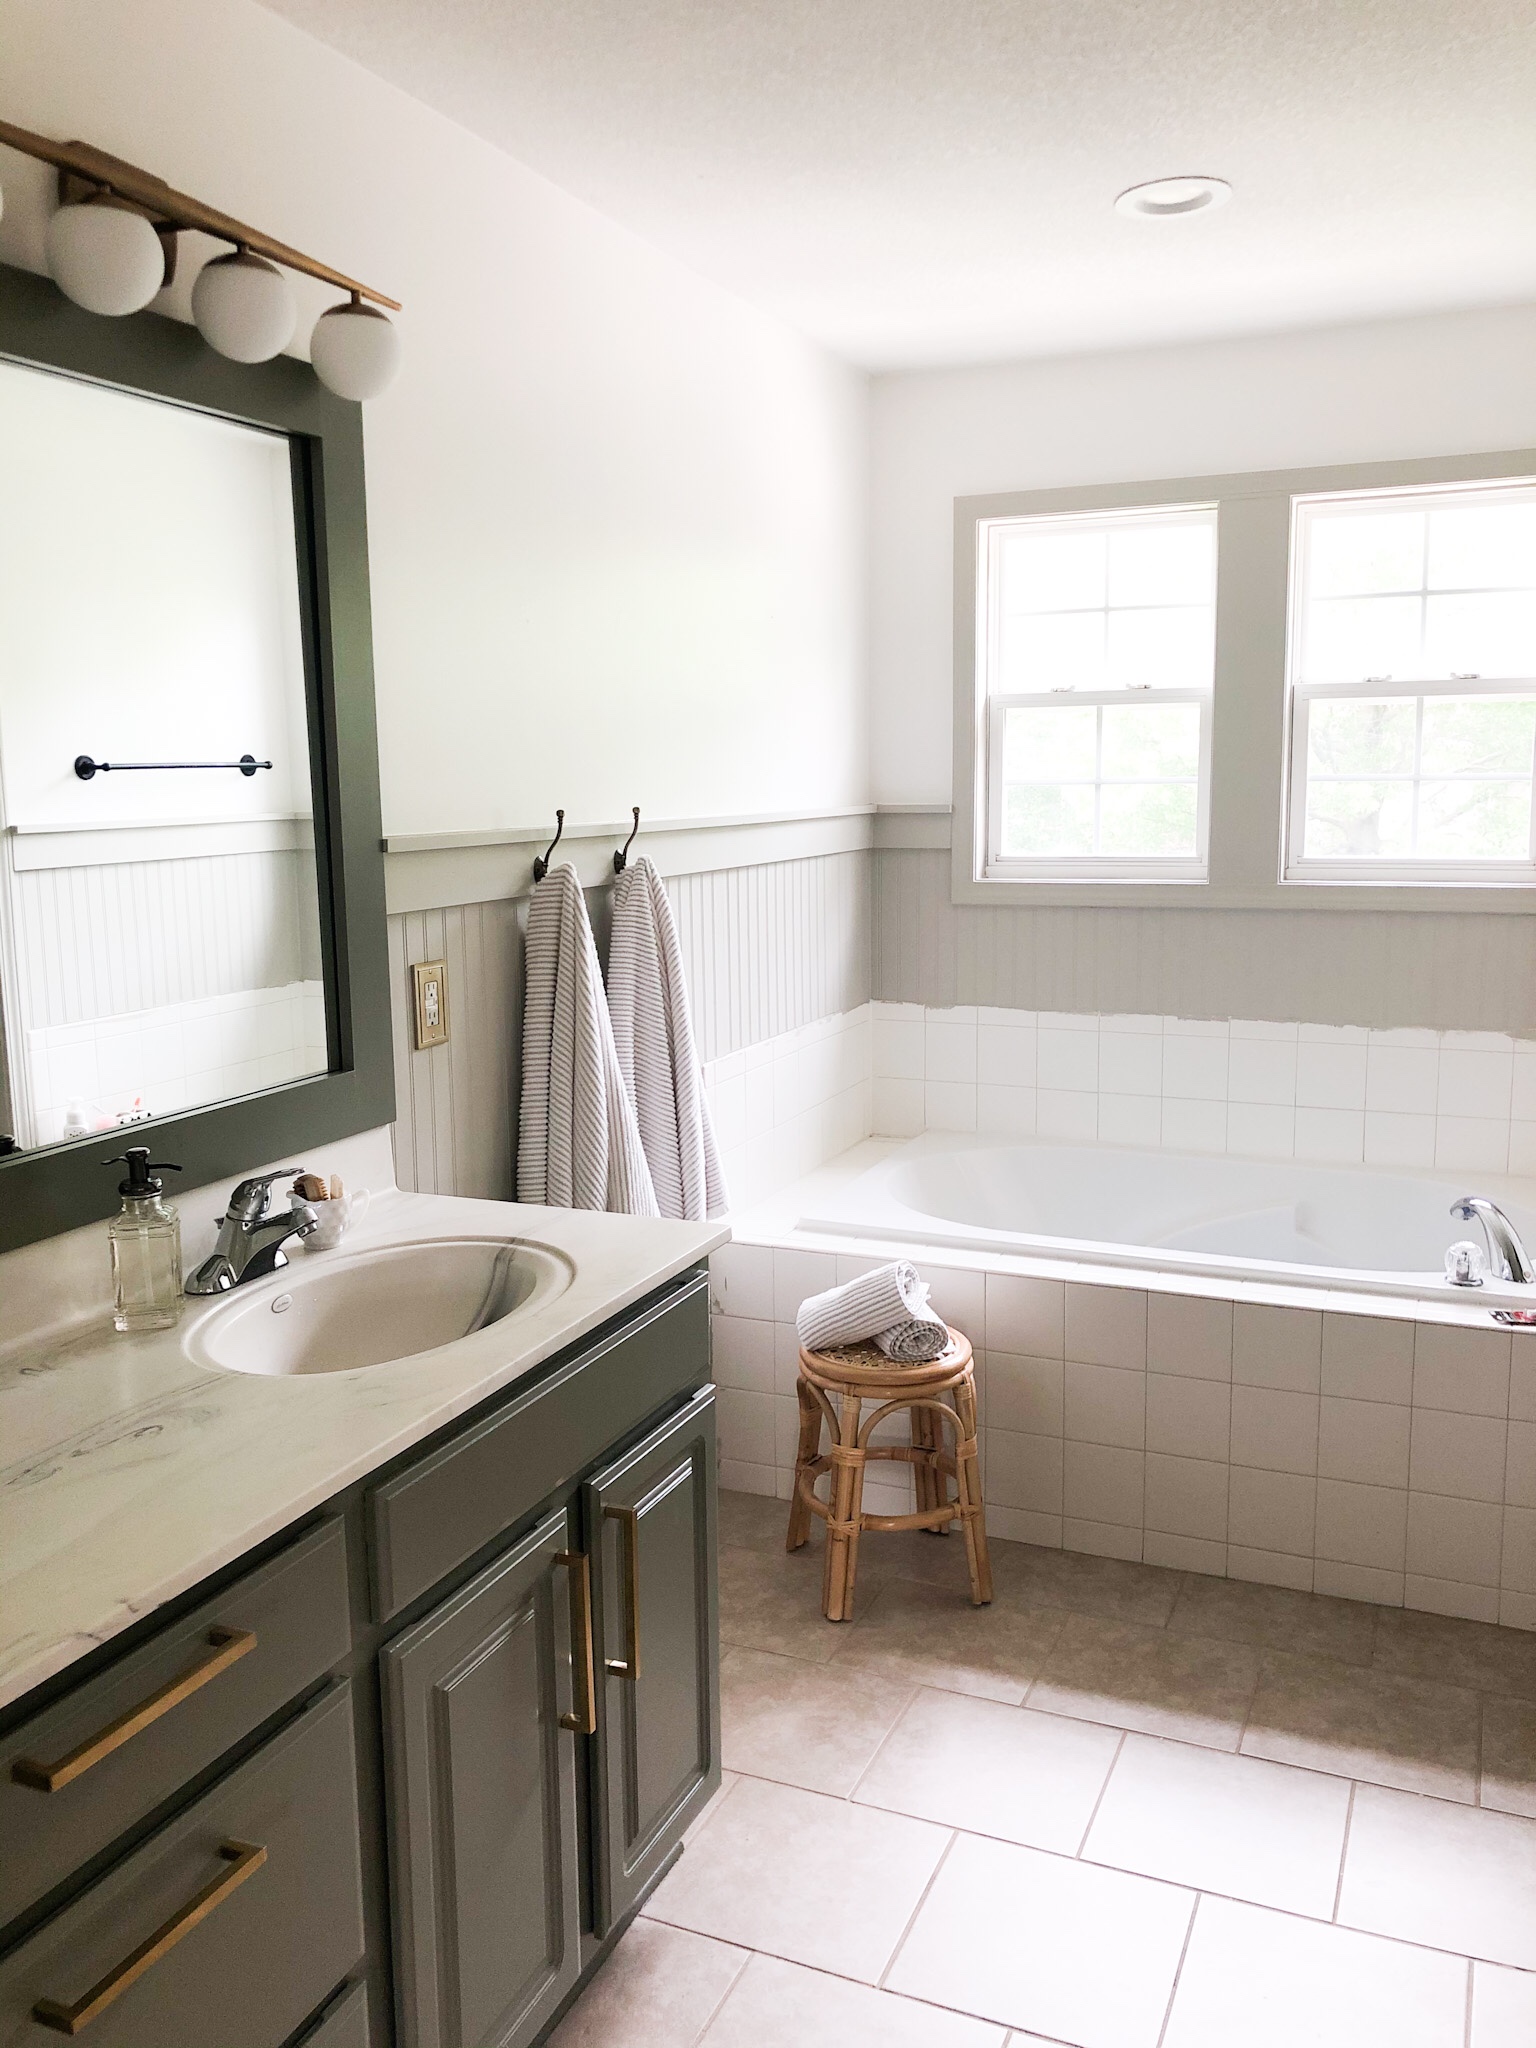
We took our early 2000’s vibe master bath and completely changed the look of it with some paint, beadboard, and new hardware. While I would’ve loved to completely renovate this space and change the layout to get rid of the tub and put in a giant shower, it just wasn’t in the budget being that we just bought our house. But it is now a place I enjoy spending time in and can live with for another 10 years until we have an extra 30K+ to renovate completely. And my dad says once you put some blood, sweat, and tears into a project, you may never want to destroy your hard work. He was a major part of this refresh. He measured and made the cuts on the beadboard and trim border. While I don’t think I could go and recreate this project myself, I could be much more efficient with many parts of this project next time.
I’ve always wanted beadboard or wainscoting. It gives so much texture and richness to a room. During my research of materials and paint colors to decide what look I wanted, I came across the @thewhitebuffalostylingco page. I loved the look they were able to obtain with beadboard and a trim border. So that became the inspiration for our entire refresh. We originally planned to rip out the floorboards and base shoe to install beadboard, however I found thin sheets of beadboard with the exact look I was going for. I found these 4’x8’ sheets at Lowe’s and they were able to cut them down for me into 2’x4’ sheets that could fit into my car. I realized once I held them up to the walls in my bathroom that they were thin enough to be flush with the floorboards. Yasssssssss. This meant we didn’t have to demo the existing floor boards and replace them as well as the base shoe. If they would’ve been thicker, they wouldn’t have looked right with the existing floor boards and we would’ve had to scrap them. Let’s not add another tedious step to a DIY project, amiright?
The best part was I got all the boards I needed for less than $100. I measured around the diameter of my entire bathroom to figure out how many boards I needed. I could’ve gotten away with getting 4 but I bought 5. If you don’t do home renovations for a living, you’re gonna want an extra one. There were several mistakes made where we needed extra. For the border we used 1×4” and 1×2” pine boards.
We started with putting beadboard on the one wall in the bathroom without any tricky cuts. Because I had to cut down the boards to 2×4’, the widest we could lay at one time was 2’ across. If possible, leave them as 4×4’. It makes for less seams in the boards once they are on the walls. I was able to go back and patch them but they were still slightly visible in the end. We used liquid nails to adhere the boards to the wall but also used an air nailer to secure the boards in place. By far the most difficult part of the process was measuring and cutting the switch plate cutouts. The other difficult part was cutting the boards to fit up to the vanity counter and around the tub. Luckily my dad is an engineer who owns some saws. And still, we made several mistakes and had to scrap some boards.
Once we had all the beadboard installed, we put up the trim border.
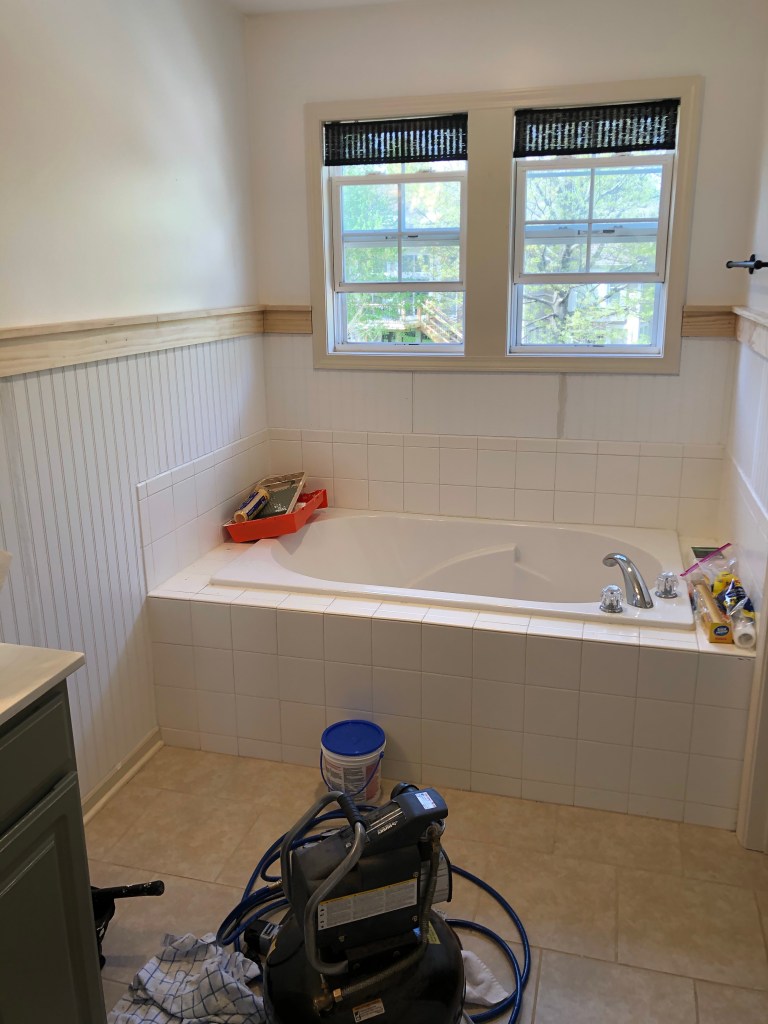
It looked so much more finished once we added the border. This part went very quickly compared to making all the cuts for the beadboard. We again first used liquid nails to adhere the pine boards to the walls, then reinforced them with the air nailer. We found out we had to use finishing nails for the top of the border (1×2” boards), however. After this was complete, I went back and filled the seams with joint compound and later sanded down to hide as much of the seams as possible. I also made sure to fill the holes made by the air nailer and finishing nails.
The next decision I had to make was what I wanted to do with the plain borderless mirror. I could’ve ripped it out and bought 2 adorable, modern, framed mirrors. These though are sooooo expensive, so to cut costs we decided to make 2 frames the size of the mirror with pine boards. It cost all of $12 and we were able to achieve the look of a custom built in mirror. See “Bathroom Vanity and DIY Mirror Frames” post.
Now for the fun part, choosing paint colors. I have had a slight obsession with green lately, so I was determined to use some shade of green in the bathroom. I can also thank The White Buffalo Styling Co for finding the most gorgeous color of green. It’s Conduit Gray by Sherwin Williams. Even though it’s called gray it looks like a deep sage green. I needed to find a color that complimented this so I chose a “greige” color. My eye kept coming back to the same color I first saw in @amberinteriors kitchen, Revere Pewter by Benjamin Moore. If there was a way I could love another color as much the green I used on the vanity, this was it.
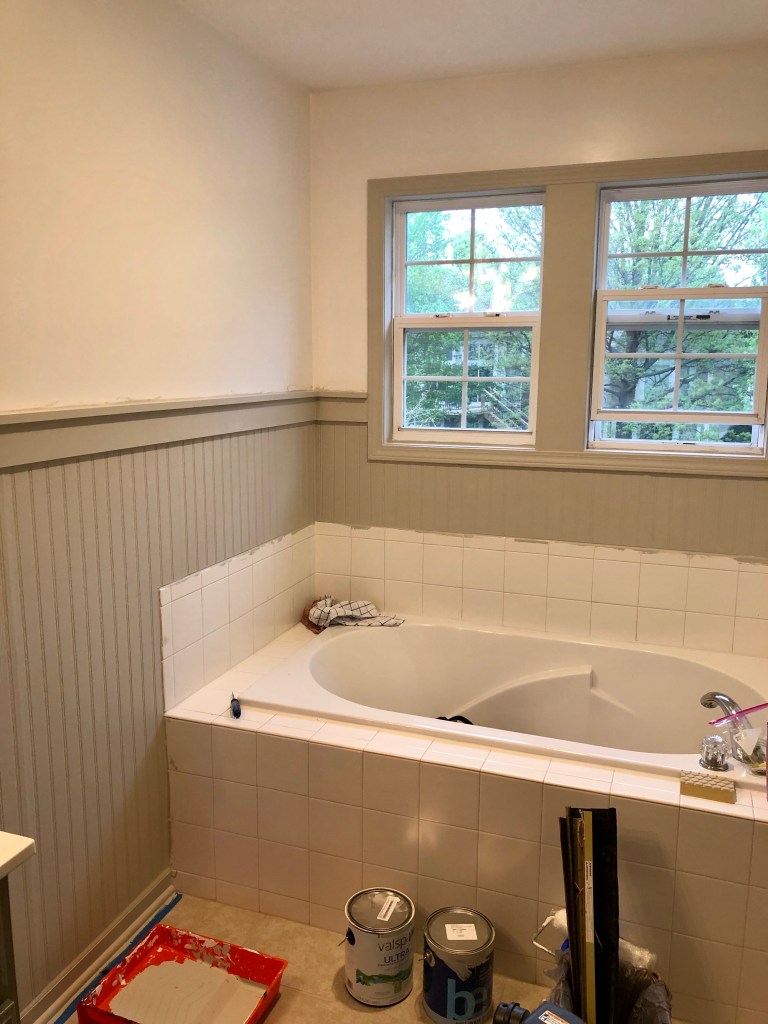
I used a large brush to brush the grooves then used a small foam roller to cover the beadboard. You’ll notice I didn’t use tape on the tiles because I have a fun project in store for those next. I painted the window, door trim, and doors the same color as the beadboard/border. After completing this we hung the DIY mirror frames, new light fixtures, and will soon be getting matching brass faucets to complete the project. YAY! New master bath here I come for some relaxation time!!!!


What kind of paint did you use on vanity
LikeLike
Sherwin Williams Conduit Gray in Satin finish. It’s so pretty in person 😍
LikeLike